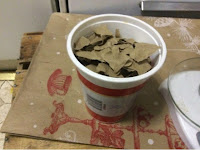
Worm Harvester MK I

Worm Harvester MK I.....           

Have been a tad busy writing reports & curriculum for next year so have only just gotten around to finishing off the Worm harvester this morning...

It is only a "Dodgy Brothers" attempt until I can find a few more bits & pieces... Just need it to do this batch of castings so we can put the Worms into their new home...

Hopefully there should be a fair amount of work done in the garden tomorrow, Bilious willing...

Saving Seed...

Koo insisted I put the picture to the Left in.... She has had her eye on that bean for the last few days... : )»
Managed to save some of the unknown beans.. I already have a place for them to go once they finish drying out...

Thats all for now me thinks...

Have a great one all...
: )»
Read More..

The Worm Kingdom !!

Worm Farm...
Finished the Worm Farm on the weekend....

All that is needed is to line the base with some weed cloth, add the soaked coir block as bedding, some food & the worms... The only bits purchased was the barrel, latches, rivets & some washers... The rest was found around the house...
Some 75% shade cloth was used  for the air vents... The vents were framed with off cuts of aluminium I saved from when we had the louvres replaced... The hinges & flat used on the door were left overs from old cabinet & cupboards that have been recycled for the timber & accessories... The grate in the base are racks from a scrapped oven topped with some square mesh... The stand is made from an old phone table & some saved bed frame timbers... The tap assembly is from left over Irrigation supplies......  A start was made on the Worm harvester today...(Right) It shouldnt take much to knock up the frame...

Pests...


Well, as you can see (left) the bread clips didnt do anything to stop the White Cabbage butterflys... I am thinking about cutting out little White Cabbage butterflys out of ice cream containers, as suggested  on a gardening  thread on the  Simple Savings wed site, & hanging them over the plants most attacked by them.....   The Caterpillar on the Right is on the Tahitian Lime... There were about 15 of them having a great little feast... They now all be Chook food.... Still havent found the Butterfly species they belonged to but the Lime comes first unfortunately for them...

Not to certain what sort of fungus this is that has grown around a Red Cabbage seedling... The plant appears not to be affected at all.... These growths have popped up a few times in the bed over that past few months...
The Turnips shall all be harvested tomorrow... Not all of them are quite full grown but they need to come out due to having a mildew problem..They are in the same bed as the Cucumbers which I think are more valuable in the long run...

Babies...
I didnt get around to hooking up the Wetpot garden down the side of the house or setting up the 2 Wicking Barrels with more Strawberries & the Cape Gooseberries out the back... There is always later as end of year reports for school must come first...

Weekly Harvest...
The havested veg havent changed much this week....
Lettuce,  Beetroot leaves, Orange Chillies, Turnips, Baby Carrots, Tomatos, Strawberries, assorted Herbs/Lime leaves, Beans, Eggplant, & 3 eggs a day...
 Koo picked the Turnips in the picture by accident while trying to pick some leaves for the Girls.. Such is as they are all getting picked, blanched & vacuum sealed for future stews & casseroles tomorrow hopefully...

We also had 5.7mm of rain according to Weather Zone...

Thats about it for now...
Have a great one all....

: )»
Read More..

Random pics

Not much happening at the moment in the garden other than Rain & the arrival of a few babys here & there... Everything but the All season Carrots, & Cylindrical Beetroot have sprouted.... Ther are 3 Carrots & 5 Beetroot but I think that may be it...
The Zucchinis are going great guns at the moment along with the Eggplants, various Capsicums/Chillies & the mix planting of Climbing & Bush Beans...
I am getting a tad concerned about the Turmeric & ginger rotting as the barrels are in are very sodden so may have to investigate this week sometime..


 The Butternut Pumpkin had a single Female flower with no males around so I decided to experiment after viewing a Zucchini Pumpkin Hybrid clip on You Tube.... Will be interesting to see how it go & shall be updating as it progresses if the pollination "took"...

The Golden nugget Pumpkins were thinned out on thursday & have started to produce some Male flowers, but to late for the Butternut..


Below are just some shots we took with our new Camera....


Left: The over crowded beans & eggplants...  Heaps of growth this week on the Mini Roma tomatoes behind...
Right: Bed 3 with Beans, beetroot & silverbeet Shooting... Behind is the Turnip, climbing bean & Cucumber bed..


This weeks harvest....
Beetroot leaves,  lettuce, Strawberrys, Zucchini, Beans, Kale, Honey Snap Peas, Snowpeas, Shallots, Cabbage, Silverbeet & 3 eggs a day.....

 We have also had about 24mm of rain in the last week with showers everyday & are expecting the same until next Sunday.....
Read More..

Worm update

Worm Kingdom Update...
An update for Lynne & all... :
The worm farm is going great guns... The little fellas are munching through 3-5 kg worth of "processed" food every week... It is getting near time to harvest the little fellas so they can start again as nearly all the Coconut coir bedding has been turned into castings... They love to mass under their food along with a few Black Soldier fly larvae... The larvae are no real problem & when picked out make a great source of protein for the Chooks... Some even farm them as a food source for their Chooks & for fish bait/food... Here is a great site with heaps of information on the Larvae... http://www.microponics.net.au/?p=175
We have been stockpiling the Worm wee over the past few months just for the Autumn crops... I pour about a Litre into a 9 Litre watering can then spot water the Veggies & lime trees every second week... None have complained yet so it must be good...

Horse Poo Palace...
 Charming name me thinks... **giggles to self**

The old worm farm has been sitting around doing nothing but storing some Wetpots so today it was put into action as a farm again...
 I filled the 3 tiers of the farm with some of the "special blend"  manure compost with some Sugar cane trash and about 1 cup of worms for every level... It will be interesting to see just how fast they get comfy, start little families & eat their way through the mammoth size meal that they have..

My Favourite plant...

B? & I have this thing when we go driving around where we get so excited when we see nature start to take back over what we Ooomans think we have conquered... Trees & grass growing in gutters always bring a smile & grass growing from cracks in the centre of bitumen roads just makes us do a seated Happy dance in the car, much to the disapproval of the spawn in the back seat... That is one reason I dont mind the weeds & grasses growing in between the paved paths between the beds... I figure they also provide food for pests which in turn feed the countless Skinks, Geckos & spiders that live in the gaps around the beds & pavers... This Sweet Basil deserves to be a revered plant & wont be harvested unless catastrophe strikes all the other Sweet Basils that are popping up in & around the patch... The others that live in the lawn around the patch are still there even though they have snapped their main stems due to their size... Nothing better than the smell of fresh Basil as you walk around the patch & disturb the leaves on the plants...


Have a great one...

:
Read More..

How to make an easy as worm barrel farm for lawn clippings garden scraps


It really cant get more simple that this barrel farm.. I call it a dump & walk barrel as that is how I feed it.. A catcher or 2 or lawn clippings get dumped into the barrels & I walk away, its as easy as that.. The prunings & old plants from the veggie bed in the patch go in whole if they are small enough or get the once over with the lawnmower to chop them up a bit if they are to large..


A great type of farm to have under a fruit tree as any nutrients that leach out will feed the tree.. One like this will be added to a new bed we are making out the front soon..

For more regular updates & pictures from the patch come visit us on our Bits Out the Back Facebook page..
Have a great one All...
R?b..
Read More..

Worm Farm Renovations

I went to feed the Worms the other day & found the Farm to be very sodden & with a slight, for the want of a better word, whiffy odour.... Worms were attempting escape & had congregated around the lip under the lid of the Worm box...
We have had this problem before & thought we had rectified it by leaving the tap open allowing the Worm "Juice" to drain into a small bucket that sat below it....
Unfortunately we hadnt allowed for blockages when bits of the castings fall through the grate & then block the tap.... This slowed the flow of the liquid to only a drip which in turn caused the base the first tray to flood.... There were many a worm casualty but the majority of our "Squirm" (Apparently, this is the collective noun) of Worms were rescued...


 The Sloppy casting soup from the base & bottom tray were scooped into an old pair of stockings which was then suspended over a bucket to allow all the excess liquid to drain out leaving only nutrient rich castings & a few Worms that are probably very happy they didnt drown...

The castings will be used in the garden to line holes/trenches that plants/seeds will be planted/sown into... We have had great success with this method of planting with the only draw back being that we now class the hundreds of Tomato seedlings that pop up as weeds.... Bit sad but you can only give away so many...


  As for the Worm Farm, I removed its rickety legs & have placed it on an old Cockatoo cage we "inherited" from curb side clean up...  A dry clean tray was lined with some moist Sugar cane mulch... The remaining Worms along with the castings, newspaper & food from the top tray, were emptied on top of the mulch & covered with some damp newspaper.... Between the tray & the base I have placed some 90% shade cloth in the hope that any castings or worms that all through the grating will get caught.... Hopefully this will fix the blockage problems for good...

I checked this morning to find the smell has gone, the trays have returned to being just moist & the worms are happily devouring the food, newspaper scraps & cane Mulch...
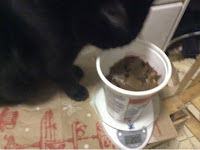
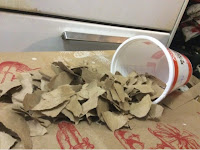
The worms get feed mainly scraps from the kitchen that we Blitz in the food processor with some water... The dont put in Onions, Citrus, & meat...  I know worms will eat meat but we choose dont add it so as not to encourage any large hairy rodents to our property... We have found that by Chopping their food up that it gets eaten faster & we get castings faster... Well worth the few minutes  to chop it in the possessor I think... One thing we did see on a clip from a Worm breeder was that they love bread & tend to go into a feeding/breeding frenzy under a slice of bread left on top of the food... We have tried this & have found a huge "ball" of worms writhing under the slice.... I cant verify the breeding claim as my eyesight just isnt that good....


Did you know worms,
are Hermaphrodites
have no eyes or ears
are very sensitive to light but are vibrations
worms have 5 hearts
can eat half its body weight every day

live for up to 10 years


Have a Great one All...

: )»
Read More..

The 2 worm challenge

See my little helper checking my work.
Around 3 weeks ago, the redwormcomposting.com guy posted a new experiment. The experiment consists in setting a small container with 2- only 2 - immature worms. The goal is to see how fast can the worm population expand from these 2 founders.
The worms have to be immature, as mature worms can carry fertilized eggs, which may skew the experiment. 


This is how I have set up the experiment:
1 ricotta cheese container - 32 oz 
Brown paper bag and 4 toilet paper roll - 51 g - dry weigh
40 ml of water from the system (the --ponic system)
55 ml of water
2 immature worms
This morning used Cofea grounds - 46 gr


I filled the container with half of the paper (shredded)

added 20 ml of water from the system


As I regularly add compost tea to the system, I am confident that this water contains some microorganism that will help the composting process to jump-start.
I then added the coffee on one side and added the worms on the other side.
  I added more paper to the top
I then added  more paper, added the rest of the system water, and the tap water.
And finally closed the top, and stabbed holes on the lid to allow airflow.


Et Voila!!!
Read More..

Molasses based fertiliser using seaweed emulsion or worm juice castings tea

We have seen some great growth lately after applying molasses based liquid fertilisers so thought I would share how we have been mixing it up.. Will be moving onto a worn "juice"/wee & worm casting tea once the seaweed emulsion runs out..


Have a great one all..
: )»
Read More..

Harvesting worm castings from the Bathtub Worm farm


Decided it was time to harvest ½ of the worm castings from the bathtub farm on the weekend.. As always, I was surprised at how well they break the manure down into castings that the garden will love.. Planing on using some to make up worm cast tea in the coming weeks as well..

If you havent seen how the worm bathtub was set up this might help.. While I was lucky enough to have enough material to make a waste high frame to sit ours in, many just sit them on bricks or small wooden stands to give them enough room to be able to collect the leachate from the plug hole in the bath..

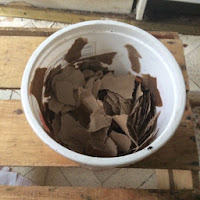
Also did a "How & what we feed the worms" clip a while ago...
I think this is the fastest way to turn veggie scraps into a useful garden fertiliser.. I also think that it helps the worms breed faster as they are able to consume more food & are in better condition.. I could be wrong but that is my observation..


For more regular updates about the patch come visit us on our Bits Out the Back Face Book page...
Have a great one All...
: )»
Read More..

The worm experiment update 2

The 3 bins on top of the flow through crate
A few weeks back, I have started the experiment suggested by Bentley compost guy. The basic idea, is to take 2 juvenile worms, and let then grow and reproduce in a small container.
Since I have started the experiment, I set up 3 bins, 1 with 2 juveniles, 1 with one juvenile (some worms may be able to auto reproduce) and 1 with a mature worm (mature worm may be fertilized, so we should be able to see population growth there).  The mini bins have been checked every 10 days, and until yesterdays check, I have not seen any cocoons.


Cocoon, right in the center
This time I have found 4 cocoons, and 3 worms in the 2 juvenile bin! That mean that I have missed at least one cocoon in the last 2 checks, as a cocoon should take around 20 days to hatch depending on temperature and other condition. On the right is the picture of one of the cocoon I found, next time Ill use an actual camera to get a better picture. The yellow dot in the middle is the cocoon, the colour of a cocoon is an indication of its development stage: yellow is newly layer, brown is close to hatch. All 4 cocoon I fond were yellow, expect this one that was brown on one side, but yellow on the other side (I have taken the picture showing mostly the yellow side otherwise the phone camera does not show it.)

For the 1 worm bins, I have not seen any cocoons, But I will see if worms "appear" as it is pretty difficult to see the cocoons. I have noticed that when I make compost tea, the cocoons have tendency to float on the top, maybe I should drawn the mini-bins to get a more accurate cocoon counts. 

Overall the worms were rather sitting in the bottom of the bins, where it is quite soggy, it is a bit different form the worm crate, where they are dispersed throughout all of it, but I suspect that the population density has something to do with it, in the worm crate the "sweet" spot would rather be overcrowded, forcing the worms to use all of the available space.

Read More..

Worm challenge update 1

The bedding has compacted
Its the end of the first week of the worm challenge, so I couldnt help myself that opening the container, spread things around and look for the worms to see if they survived there first few days.
 And the answer is : (drum roll) 

Yes! I could find easily the on that was already bigger, and I think it looks bigger now, but I dont think it has become fully mature - but it will be soon, it seems that the clitellum is appearing.  The other one is still smaller.
The black particle you see are not worm castings - it is the used coffee grounds I added while setting up.
Some one asked on google plus how I would be managing the "gene pool" as a population developing from 2worms will obviously be heavily inbred. My first answer was that I would return these worms to the "General population" at some point. But I might be interesting to remove a juvenile every once in a while and replace by one coming from my worm crate. Another interesting thing could be to keep them totally isolated and see if the population collapses at some point... In which case, given that most hobby vermi composters start with half a pound or a pound of worms - which is a limited population too - and coming from a worm farm that may have also started from a relatively small population-  that would mean that exchanging worms between vermicomposters may be a necessity to avoid "genetic driven" collapse. Thaugh the genetic diversity between ~ 200 worms may be enough to avoid inbreeding.
I think I might give an update every other week for the future - unless next time I check both worms have clitellums - in which case that will be the real "start " of the experiment.


Read More..

Veggie garden walk through worm barrels saving a few Okra seeds 12th

Has been a tad warm here over the past week but nowhere near as bad as some of the southern states.. The garden worms chooks & fish have pulled through just fine with only one casualty (daughters pennyroyal) so happy about that..


Now the weather has cooled off a bit I will be planting out some seedlings & tackling some odd jobs to get the patch ready for Autumn.. Will be pruning the rest of the Chinese elm & some of the mango them running it through the mulcher... This will be mixed with some horse manure & left to compost a bit.. It will eventually become Autumns top up mulch for the beds...
For more regular updates about the patch come visit us at https://www.facebook.com/Bitsouttheback

Have a great one All...
Read More..

Operation Worm rescue


Got a bit over zealous with making up a batch of worm food this week.... In my attempt to give the little fellas a treat of bread, which they love by the way, Koo & I added to much to the Worm Slushie... As a result the Slushie started to ferment in the Farm & generate a lot of heat....
 All the offending Slushie was removed then some Sugar cane mulch was added...
 This was mixed around with the castings & worms in the top tray in an attempt to cool the little fellas down.... The shade cloth that is being used to collect any stray worms or castings dropping through to the worm juice collection tray did a great job... A lot of the Worms had retreated there to get relief from the heat... there was also a decent amount of castings there that will come in handy potting out the Caped Gooseberries & Strawberries into their new Barrels/pots...


I couldnt get over the amount of worms that are in the farm... We started up the farm using a 1000 Worm Starter Pack  from Worm Affair that was purchased at a local hardware store.. I scooped out about 4 cupped hand fulls during the rescue from the top tray + the poor fellas left behind that should find their way to safety in the tray below & then there are those that found refuge in the bottom tray... I guesstimate that there is over 2kg left in the farm + those that now call all the Garden beds home... That is a big increase from the 250 grams worth we started with...

  Weather permitting, a start shall be made on the new worm farm this weekend... It shall be made from a large 55 gallon Barrel & should allow us to add a lot more food thereby creating a lot more castings for the garden... We have stopped feeding the worms that were introduced into the Wicking garden beds... They appear to be increasing in numbers just by feeding on the organic matter that we turn through the beds after every crop is harvested... Digging around in a few of the beds this week has uncovered a fair few small to large worms which to me means that they are breeding & happy in them....

Well Better get to it.....
Have a great one all.....
: )»
Read More..


Blog Archive

Diberdayakan oleh Blogger.